
Understanding the Arduino Mavlink library
Understanding the Arduino Mavlink library
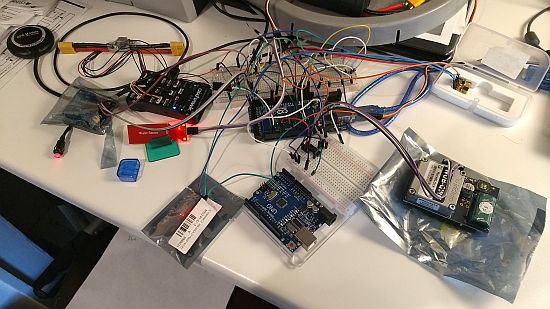
Connecting an Arduino to a Pixhawk:
See: https://discuss.ardupilot.org/t/mavlink-and-arduino-step-by-step/25566
Intermittent serial communication with Pixhawk (ig. only get console output when you put your finger on the pin header on the pixhawk)?
Set BRD_SER1_RTSCTS and BRD_SER2_RTSCTS in your Pixhawk to a value of 0 (No flow control).
Download the Arduino Mavlink library:
Sending data (a request) to the Pixhawk
After importing the library into the Arduino IDE, the Mavlink library contains all the files you would need to perform various functions on a Pixhawk, APM, or other Ardupilot based hardware using Mavlink commands.
For example, just say you want to request GPS data from the Pixhawk so you can handle them as variables on the Arduino:
To do this, you’ll navigate to the common directory and search for the relevant file. The files are all titled accordingly, so it aids in finding the correct one to open in order to see the message definitions, variable types, and arguments you’ll need to provide to your code. You will then cross reference this file with the list of messages listed at the Mavlink Developer Guide (https://mavlink.io/en/messages/common.html), and see if the command does what you want it to do. The guide also lists out the parameters required for the message, but you may need to do a few more google searches to see if the command is part of a larger protocol which needs other requirements to be met before it can be implemented (ig. uploading a full mission).

As I previously mentioned, I want to request a data stream to read GPS info from the Pixhawk, therefore I go to the common directory and look for a file which tells me that it can do such a thing. In the above image, request_data_stream.h seems to be the ticket.
**Note** the files in the library allow for bidirectional Mavlink communication…When you open the files and peek inside, you will be confronted with code used both to SEND and RECEIVE Mavlink commands. This can be quite confusing at first (it was for me!).
Inside the mavlink_msg_request_data_stream.h file:

Inside the mavlink_msg_request_data_stream.h file you’ll immediately see the struct which assigns data to variables in the event you wished to read data from the Pixhawk. You wont need this for our purposes just yet.
Further down, you’ll see a line containing something called mavlink_msg_request_data_stream_pack:

This is the line you want to pay attention to as “pack” means you are handling the data to be sent out (which we are hoping to do, so we can pack the data and (later on in the function) send it to the autopilot.
The important thing to understand is that the static inline statement above defines the data which we will want to put into the pack function, and we need to specify those values in order for the autopilot to know what we want and how we want it.
Lets break it down…
So lets break down the static inline statement shown above starting from the first variable right after the ‘(‘ symbol.
The ‘uint8_t’ defines the type of data in the variable next to it. So uint8_t system_id is asking for a type of unsigned integer of 8 bits long under the system_id variable. Like-wise for all the other variables in the static inline statement. We now just need to provide the appropriate data to populate the variables in the correct order specified in the statement for the library to pack the message in a Mavlink compatible command.
In Arduino code, it would look like this:
|
1 2 3 4 5 6 7 8 9 10 11 12 13 14 15 16 17 18 19 20 21 22 23 24 25 26 27 28 29 30 31 32 33 34 35 36 37 38 39 40 41 |
void request_datastream() { //Request Data from Pixhawk uint8_t _system_id = 255; // id of computer which is sending the command (ground control software has id of 255) uint8_t _component_id = 2; // seems like it can be any # except the number of what Pixhawk sys_id is uint8_t _target_system = 1; // Id # of Pixhawk (should be 1) uint8_t _target_component = 0; // Target component, 0 = all (seems to work with 0 or 1) uint8_t _req_stream_id = MAV_DATA_STREAM_ALL; uint16_t _req_message_rate = 0x01; //number of times per second to request the data in hex uint8_t _start_stop = 1; // 1 = start, 0 = stop // STREAMS that can be requested /* * Definitions are in common.h: enum MAV_DATA_STREAM and more importantly at: https://mavlink.io/en/messages/common.html#MAV_DATA_STREAM * * MAV_DATA_STREAM_ALL=0, // Enable all data streams * MAV_DATA_STREAM_RAW_SENSORS=1, /* Enable IMU_RAW, GPS_RAW, GPS_STATUS packets. * MAV_DATA_STREAM_EXTENDED_STATUS=2, /* Enable GPS_STATUS, CONTROL_STATUS, AUX_STATUS * MAV_DATA_STREAM_RC_CHANNELS=3, /* Enable RC_CHANNELS_SCALED, RC_CHANNELS_RAW, SERVO_OUTPUT_RAW * MAV_DATA_STREAM_RAW_CONTROLLER=4, /* Enable ATTITUDE_CONTROLLER_OUTPUT, POSITION_CONTROLLER_OUTPUT, NAV_CONTROLLER_OUTPUT. * MAV_DATA_STREAM_POSITION=6, /* Enable LOCAL_POSITION, GLOBAL_POSITION/GLOBAL_POSITION_INT messages. * MAV_DATA_STREAM_EXTRA1=10, /* Dependent on the autopilot * MAV_DATA_STREAM_EXTRA2=11, /* Dependent on the autopilot * MAV_DATA_STREAM_EXTRA3=12, /* Dependent on the autopilot * MAV_DATA_STREAM_ENUM_END=13, * * Data in PixHawk available in: * - Battery, amperage and voltage (SYS_STATUS) in MAV_DATA_STREAM_EXTENDED_STATUS * - Gyro info (IMU_SCALED) in MAV_DATA_STREAM_EXTRA1 */ // Initialize the required buffers mavlink_message_t msg; uint8_t buf[MAVLINK_MAX_PACKET_LEN]; // Pack the message mavlink_msg_request_data_stream_pack(_system_id, _component_id, &msg, _target_system, _target_component, _req_stream_id, _req_message_rate, _start_stop); uint16_t len = mavlink_msg_to_send_buffer(buf, &msg); // Send the message (.write sends as bytes) Serial1.write(buf, len); //Write data to serial port } |
You dont need to specify any variables like I did at the top of the sketch if you do not wish to, and instead just write them directly into the mavlink_msg_request_data_stream_pack() statement. Variables were defined to further aid in understanding how things work in the function.
Sent. But, what about receive?
The above function will send a request to the Pixhawk requesting the MAV_DATA_STREAM_ALL stream (which sends ALL streams) to be broadcast on the connected serial port once every second. We also know that the Arduino Mavlink library files allow both sending and receiving of Mavlink commands. Armed with this knowledge, we need to find a file which allows us to receive and process the data we requested. Looking at the information from https://mavlink.io/en/messages/common.html#MAV_DATA_STREAM we can see that 0-12 show the different sensor data which is broadcast by enabling all streams (1-6 shows the individual streams that can be enabled).
Since we know that the GPS streams are included in the MAV_DATA_STREAM_ALL we can be safe in assuming we can grab the GPS_RAW stream data by enabling all streams.

Navigating back to our common folder, we take a look around and low and behold, we see a mavlink_msg_gps_raw_int.h file which looks like it will do just what we want! So lets go ahead and open the file and see if it will give us enough information for us to grab GPS variables.

At the beginning of the file, we once again see the familiar typedef struct which defines variables to handle the GPS data that we may want to process. How convenient! Now how exactly do we use these variables? In the same file, one just needs to scroll down a bit till we find the ‘decode’ statement. This statement allows (much like the the pack statement we just went through) one to write an expression handling the variables to decode from a message being sent by the Pixhawk.

We see that after the ‘mavlink_msg_gps_raw_int_decode(‘ two variables are given which informs us we need to specify two variables to grab that data. We will then need to use the typedef struct at the beginning of the file to find the variables we can use to pull the data from the stream being sent by the Pixhawk.
An example looks like this:
|
1 2 3 4 5 6 7 8 9 10 11 12 |
case MAVLINK_MSG_ID_GPS_RAW_INT: { mavlink_gps_raw_int_t packet; mavlink_msg_gps_raw_int_decode(&msg, &packet); Serial.print("\nGPS Fix: ");Serial.println(packet.fix_type); Serial.print("GPS Latitude: ");Serial.println(packet.lat); Serial.print("GPS Longitude: ");Serial.println(packet.lon); Serial.print("GPS Speed: ");Serial.println(packet.vel); Serial.print("Sats Visible: ");Serial.println(packet.satellites_visible); } break; |
Putting the Send and Receive function together
Now that we’ve covered both the send and receive functions. Lets put them together to watch them in action:
|
1 2 3 4 5 6 7 8 9 10 11 12 13 14 15 16 17 18 19 20 21 22 23 24 25 26 27 28 29 30 31 32 33 34 35 36 37 38 39 40 41 42 43 44 45 46 47 48 49 50 51 52 53 54 55 56 57 58 59 60 61 62 63 64 65 66 67 68 69 70 71 72 73 74 75 76 77 78 79 80 81 82 83 84 85 86 87 88 89 90 91 92 93 94 95 96 97 98 99 |
#include <mavlink.h> //#include <SoftwareSerial.h> //#define RXpin 0 //#define TXpin 1 //SoftwareSerial SerialMAV(RXpin, TXpin); // sets up serial communication on pins 3 and 2 void setup() { Serial1.begin(57600); //RXTX from Pixhawk (Port 19,18 Arduino Mega) Serial.begin(57600); //Main serial port for console output request_datastream(); } void loop() { MavLink_receive(); } //function called by arduino to read any MAVlink messages sent by serial communication from flight controller to arduino void MavLink_receive() { mavlink_message_t msg; mavlink_status_t status; while(Serial1.available()) { uint8_t c= Serial1.read(); //Get new message if(mavlink_parse_char(MAVLINK_COMM_0, c, &msg, &status)) { //Handle new message from autopilot switch(msg.msgid) { case MAVLINK_MSG_ID_GPS_RAW_INT: { mavlink_gps_raw_int_t packet; mavlink_msg_gps_raw_int_decode(&msg, &packet); Serial.print("\nGPS Fix: ");Serial.println(packet.fix_type); Serial.print("GPS Latitude: ");Serial.println(packet.lat); Serial.print("GPS Longitude: ");Serial.println(packet.lon); Serial.print("GPS Speed: ");Serial.println(packet.vel); Serial.print("Sats Visible: ");Serial.println(packet.satellites_visible); } break; } } } } void request_datastream() { //Request Data from Pixhawk uint8_t _system_id = 255; // id of computer which is sending the command (ground control software has id of 255) uint8_t _component_id = 2; // seems like it can be any # except the number of what Pixhawk sys_id is uint8_t _target_system = 1; // Id # of Pixhawk (should be 1) uint8_t _target_component = 0; // Target component, 0 = all (seems to work with 0 or 1 uint8_t _req_stream_id = MAV_DATA_STREAM_ALL; uint16_t _req_message_rate = 0x01; //number of times per second to request the data in hex uint8_t _start_stop = 1; //1 = start, 0 = stop // STREAMS that can be requested /* * Definitions are in common.h: enum MAV_DATA_STREAM and more importantly at: https://mavlink.io/en/messages/common.html#MAV_DATA_STREAM * * MAV_DATA_STREAM_ALL=0, // Enable all data streams * MAV_DATA_STREAM_RAW_SENSORS=1, /* Enable IMU_RAW, GPS_RAW, GPS_STATUS packets. * MAV_DATA_STREAM_EXTENDED_STATUS=2, /* Enable GPS_STATUS, CONTROL_STATUS, AUX_STATUS * MAV_DATA_STREAM_RC_CHANNELS=3, /* Enable RC_CHANNELS_SCALED, RC_CHANNELS_RAW, SERVO_OUTPUT_RAW * MAV_DATA_STREAM_RAW_CONTROLLER=4, /* Enable ATTITUDE_CONTROLLER_OUTPUT, POSITION_CONTROLLER_OUTPUT, NAV_CONTROLLER_OUTPUT. * MAV_DATA_STREAM_POSITION=6, /* Enable LOCAL_POSITION, GLOBAL_POSITION/GLOBAL_POSITION_INT messages. * MAV_DATA_STREAM_EXTRA1=10, /* Dependent on the autopilot * MAV_DATA_STREAM_EXTRA2=11, /* Dependent on the autopilot * MAV_DATA_STREAM_EXTRA3=12, /* Dependent on the autopilot * MAV_DATA_STREAM_ENUM_END=13, * * Data in PixHawk available in: * - Battery, amperage and voltage (SYS_STATUS) in MAV_DATA_STREAM_EXTENDED_STATUS * - Gyro info (IMU_SCALED) in MAV_DATA_STREAM_EXTRA1 */ // Initialize the required buffers mavlink_message_t msg; uint8_t buf[MAVLINK_MAX_PACKET_LEN]; // Pack the message mavlink_msg_request_data_stream_pack(_system_id, _component_id, &msg, _target_system, _target_component, _req_stream_id, _req_message_rate, _start_stop); uint16_t len = mavlink_msg_to_send_buffer(buf, &msg); // Send the message (.write sends as bytes) Serial1.write(buf, len); //Write data to serial port } |
Here is what the serial console output looks like from the sketch above (GPS coordinates masked for privacy):

You now have a working send and receive sketch which will request a datastream from the Pixhawk and allow the Arduino to process the response. Note that after you request a datastream, the Pixhawk will continue sending that data at the rate which was specified in the expression. Its a good idea to stop the stream once you’ve gotten the desired data as it may interfere with uploading new flight plans to the Pixhawk.
hello, its nice tutorial, but i’m still not understand why we have do this part “Sending data (a request) to the Pixhawk” ?
and how if we want to get roll pitch yaw data ?
Without requesting the data from the pixhawk, the pixhawk will not send the data. By default it will only send certain bits of information.
thanks you for the answer, but i still i dont stand how we can translate it to arduino, because cant understand about library so i can convert itu to arduino, can you suggest me about that ?
sorry sir i wanna ask about this part “Serial.print(“GPS Longitude: “);Serial.println(packet.lon);” why we have use word(packet) ? if we just use lon, it doesn’t work ?
in the function ” mavlink_msg_gps_raw_int_decode(&msg, &packet); ” it has 2 parameter one is ” * msg ” and other is ” *gps_raw_int ” and in Arduino we referenced ” *gps_raw_int ” -> “&packet” so we have defined it to references the interior variable so to access those we need a dot operator so output will be defined as “packets.lat” and all others otherwise it will throw error .
Hi it’s really helpful that i can read some data but i cant read what i want
my attention data is RC_channel but only 0/4/26/30/31/32/74 msgid comes up although RC_CHANNEL’s msgid is 65
can you tell me what mistakes i made?? i use your entire code and add some debug msg to check receiving msgid
You should ideally disable all data streams prior to requesting data for the rc_channels.
You may need to request and monitor for the response using the appropriate files in this document.
https://ardupilot.org/dev/docs/mavlink-requesting-data.html
Bloody Brilliant. this is the best tutorial on this subject that I have read period. Very easy to understand and in depth enough not to leave me stranded and wondering. Thank you so much
Arduino: 1.8.8 (Windows 10), Board: “Arduino/Genuino Uno”
C:\Users\zihad\OneDrive\Documents\Arduino\sketch_dec16a\sketch_dec16a.ino: In function ‘void setup()’:
sketch_dec16a:9:3: error: ‘Serial1’ was not declared in this scope
Serial1.begin(57600); //RXTX from Pixhawk (Port 19,18 Arduino Mega)
^
C:\Users\zihad\OneDrive\Documents\Arduino\sketch_dec16a\sketch_dec16a.ino: In function ‘void MavLink_receive()’:
sketch_dec16a:28:9: error: ‘Serial1’ was not declared in this scope
while(Serial1.available())
^
C:\Users\zihad\OneDrive\Documents\Arduino\sketch_dec16a\sketch_dec16a.ino: In function ‘void request_datastream()’:
sketch_dec16a:98:3: error: ‘Serial1’ was not declared in this scope
Serial1.write(buf, len); //Write data to serial port
^
exit status 1
‘Serial1’ was not declared in this scope
This report would have more information with
“Show verbose output during compilation”
option enabled in File -> Preferences.
I got this problem. I have installed the library. What could be wrong?
You might have to use software serial for an Arduino Uno.
Hello,
I need your help.
I tryed to use your code. Howerer it’s says : “Serial1 is ont declare in this scope.” do you know why?
Thanks!
Hello,
very nice tuto!
I really need your help.
I try to use your code. However, it says: “Serial1 is not declare in this scope”.
But why? Can you help ?
thanks!
I’m using an ardino mega which has hardware serials. You may be using an Arduino which may not have any and only uses software serial. You may need to change the code accordingly.
Hello Adrien, thanks you for reply.
Ok I change the code to use it on Anduino nano. so i change the begining:
#include
#include
#define RXpin 0
#define TXpin 1
SoftwareSerial Serial1(RXpin, TXpin);
However, now impossible to upload it:
avrdude: stk500_recv(): programmer is not responding
avrdude: stk500_getsync() attempt 10 of 10: not in sync: resp=0x5c
any idea?
Thanks,
Jean
You may have to disconnect the wires on 0 and 1 before you upload.
You might want to look into the reference for software serial on http://www.Arduino.cc/en/Reference/softwareSerial
yes exactly thanks! totaly forget to do it!
ok i found it! Just remove the RX to upload !
Hey. Excellent tutorial. A question say I want to update a variable on Pixhawk using an arduino?
To be particular, I wanted to know if I can connect and Arduino to the telem2 port and update either rpm1 or rpm2 in pixhawk?
I do not believe you can do so natively using mavlink1. You could potentially output a pwm signal on an arduino pin which mimics the rpm you are sensing with the arduino, and connect it to the pixhawk pins which sense rpm. This should allow the pixhawk to sense rpm using pwm without using telemetry or complicate the data on the serial lines.
I connected arduino (serial1) to pixhawk S(serial2).
Could you explain to me why I have a heartbeat, I can write and rewrite the RC. But I can’t request data from my pixhawk. My pixhawk sys is Vehicle 1,Comp 1
I changed the target id, sys id. I’ve tried Mavlink1 and 2, different SERIAL2_BAUD. I am expecting to have an answer from the pixhawk in loop with the different msg.msgid. Now I have only 0 and 66. Heartbeat and request.
#include “mavlink.h”
// Mavlink variables
int sysid = 1; ///< ID 20 for this airplane. 1 PX, 255 ground station
int compid = 158; ///< The component sending the message
uint8_t target_system = 1;
uint8_t target_component = 1;
int type = MAV_TYPE_GROUND_ROVER; ///< This system is an airplane / fixed wing
uint8_t autopilot_type = MAV_AUTOPILOT_PIXHAWK;
uint8_t system_mode = MAV_MODE_PREFLIGHT; ///< Booting up
uint32_t custom_mode = 0; ///< Custom mode, can be defined by user/adopter
uint8_t system_state = MAV_STATE_STANDBY; ///< System ready for flight
unsigned long request_timer = millis();
unsigned long heartbeat_timer = millis();
void setup() {
// MAVLink interface start
Serial1.begin(57600);
Serial.begin(115200);
}
void loop() {
doSendHeartbeat();
dorequest();
comm_receive() ;
If using an Arduino uno you may need to use software serial.
Double check it’s not something simple such as specifying the wrong pin for tx on the Arduino sketch.
Also, make sure your Arduino ground connects to the pixhawk
It’s Arduino pro and hanshake works.
And RC from Arduino replace the data in puxhawk.
I would just start with my example sketch and see if you can get the same results. If so then there’s probably something which isn’t right in your sketch.
Great Tutorial! Thank you for your work!
But when I want to use your code, I run into the problem that I don’t get any output. I also use an Arduino Mega, wired like you.
I tried around a bit and found out that the code in the switch case doesn’t find the “MAVLINK_MSG_ID_GPS_RAW_INT”, or the case doesn’t exist and therefore the code in this case is skipped too.
Do you know what could be the reason for this? I would be very grateful for a short help!
Make sure you have all the libraries imported which are listed at the top of the sketch (such as the mavlink library)
Hey, I have looked at everything again the last few days. All libraries are included and I also see a heartbeat, which I can also decode. However, a Vehicle 1 and a Vehicle 2 show up in MissionPlanner. But I only get the heartbeat of Vehicle 1 (this one has only the heartbeat and no other information). Vehicle 2, however, has all values. Do you have an idea how I can access the Vehicle 2. I have already tried different values for System and Component ID.
Translated with http://www.DeepL.com/Translator (free version)
See here.
https://mavlink.io/kr/about/faq.html
Otherwise you’ll need to check that your code for each vehicle are configured correctly to send using the right ids to the GCS.
Hey, I have looked at everything again the last few days. All libraries are included and I also see a heartbeat, which I can also decode. However, a Vehicle 1 and a Vehicle 2 show up in MissionPlanner. But I only get the heartbeat of Vehicle 1 (this one has only the heartbeat and no other information). Vehicle 2, however, has all values. Do you have an idea how I can access the Vehicle 2. I have already tried different values for System and Component ID.
Bonjour
Je vous remercie pour votre génie en matière mavlink – arduino, c’est un trés bon travail. il reste à savoir comment transmettre les coordonnées gps d’un waypoint vers arduino à partir de mission planner via mavlink.
Hi,
Thank you for your great tutorial , it is simple and explained very well .
I am working to interface Arduino and pixhawk through Mavlink protocol , the thing i want to do it is that arduino read voltage and current values from a battery which i want to send to override on the voltage and current value showing on the HUD of the GCS. can you help me throught which mavlink command i can do this?