

Programming a BLHeli ESC with BLHeli Suite for use with autonomous boats
In order to control the speed of a brushless DC motor like the one I use in LoCARB, one needs to use an electronic speed controller. Unfortunately, the RC world has multitudes of ESC units, some which are suitable and some which are not. For the LoCARB refresh, I used a Flycolor Raptor brushless motor ESC which runs cool and efficient. However, out of the box configuration needs to be tweaked so the low kV motor can run at optimal performance.
Why program the ESC?
Out of the box testing of the Flycolor Raptor BLS-Pro 30A ESC exhibited some strange throttle reduction due to a setting in the BLHeli software. After programming the changes, the strange throttling went away and the ESC performed consistently.
How to program the BLHeli-S ESC
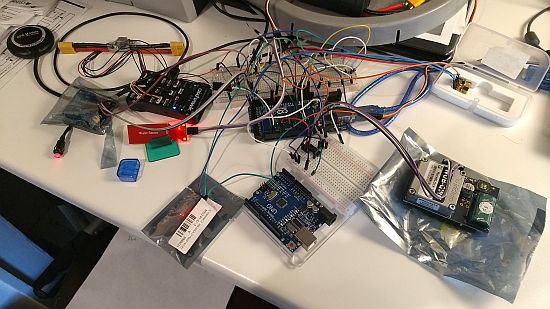
Programming the BLHeli-S ESC is pretty straightforward. I simply flashed an Arduino Uno as a 4-way programming interface, then connected the Ground wire of the ESC connector to the GND on the Arduino, and Signal wire of the ESC, to pin 11 on the Arduino.
Lets get started
Download the BLHeli Suite – The FlyColor Raptor ESC is NOT a BLHeli32 ESC, download the NON 32 version. The link referenced provides the latest BLHeli suite and lists some forum threads on the software.

Extract the archive to a folder on your desktop and run the BLHeliSuite.exe file to get started.

Once the BLHeliSuite is open, you’ll see a menu similar (if not identical) to the one above. Click the Make Interfaces tab (circled in blue)

Select your Arduino board (I have an Arduino Uno)

Plug in your Arduino and select the corresponding COM port.

Click the Arduino 4way-interface button

Click OK on the dialog box that shows up

Select the MULTIv20002.hex file and click OPEN

Click Yes

After a successful flash, the program will display a window much like the one above. Click OK to continue.

Once back at the make interface menu, click the SILABS ESC SETUP TAB and select the correct Arduino Com Port.

Click the Select ATMEL / SILABS interface menu, and choose the SILABS BLHELI BOOTLOADER (4way-if) interface
 Connect your ESC GND pin to Arduino GND, and ESC SIGNAL pin to Arduino D11. Next, supply power to the ESC by connecting a compatible power supply or battery to the + and – ESC Power leads.

Click Read Setup

If all goes well, you’ll see a dialog box confirming the ESC configuration has been read successfully.

Change the variables to the ones below (circled above), then click Write Setup
- Low RPM Power Protect: OFF (turning this off stopped the ESC from auto throttling to ~1000 RPM)
- Motor Timing: MediumHigh (gives more power to the motor)
- Programming by TX: UNCHECKED (keep from accidentally calibrating ESC with wrong values)
- PPM Min Throttle: 1036 (or whatever low value)
- PPM Max Throttle: 2000 (or whatever max resolution you desire)
- PPM Center Throttle (optional): 1032 (doesnt really matter on non reverse ESCs)

A dialog box will appear if the write was successful. Click OK. The ESC has been successfully programmed.
Next Steps…
Now that the ESC has been programmed, you can connect the ESC to your motor without fearing the ESC will be incorrectly calibrated on startup by whatever errant signals, or any erroneous calibration routine you have in the Arduino. You will not be able to program the ESC using a transmitter since that feature has been disabled.
You should also not experience any strange behavior with the ESC taking over the throttle response after a few hours of run time.
I found that with the 370kV motor I am using with the battery pack I built, the lowest PWM signal sent to achieve my desired throttle is 1300, with a max of 1600. This gives me a predictable degree of control for the range of speeds I believe will be useful depending on battery voltage conditions.
If you feel so inclined, you can update the firmware of the ESC to the latest 16.7 (at the time of writing).
Hi, I appreciate the article! It taught me how to read and write settings to my ESC. Do you by chance know what type of signal the BLHeli Raptor 20A ESC needs to accept in order to drive motors? I will be using these to drive a couple of electric motors
It should just need a PWM signal
I should have been more specific, I know that it will need a PWM signal to function. Which other characteristics will it require to operate correctly? I am thinking there might be a manufacturer recommended pulse voltage, pulse width, and/or pulse frequency to ensure proper operation.
Ah, just use the Arduino servo library to control the 50hz pwm. You’ll need to figure out which value between the standard 1000-2000 corresponds to what rpm depending on voltage used to power the motors.
https://howtomechatronics.com/tutorials/arduino/arduino-brushless-motor-control-tutorial-esc-bldc/
Thanks again!